I’ve mentioned before in other posts about how a home is a constant work in progress. And the pantry is perhaps the BEST example of an area that needs constant, vigilant maintenance.
I played with the phrase “happily ever after” for this post because the previous pantry project post (if there were points for alliteration, I’d be winning today!!), part I, if you will, was titled Once Upon A Pantry. And, well… we all love a happy ending.
But the title turns out to be ironic. No “ever after” here. I know my picture perfect pantry (there I go again…with irony AND alliteration!) will only look “picture perfect” until the next grocery run. Which happens about three days a week with four adults in the house–who have all different diets and schedules.

And even the outer, pass-through part of my peculiar pantry pigeonhole is not a finalized masterpiece, by any stretch. I’ll highlight that area in this post. (Check out the last post to see the before and afters on the interior of the pantry.) And I’ll share the small changes I made to spruce up the space. I’ll also tell what I did to get rid of an extra, unnecessary maintenance chore.
And finally I’ll talk about keeping a happy pantry–or at least keeping the pantry owner/operator happy…
The Sprucing-Up Part
Paint Prep
As in the other two rooms I’ve done this year, the pantry was in need of some serious caulk and paint prep work.

So in addition to just sanding the semi-gloss trim for proper adhesion, there was quite a bit of patching and smoothing to do. And I’m learning this one very important lesson (that may apply to other areas of life): I have to quit before it’s perfect or I’ll never be done.

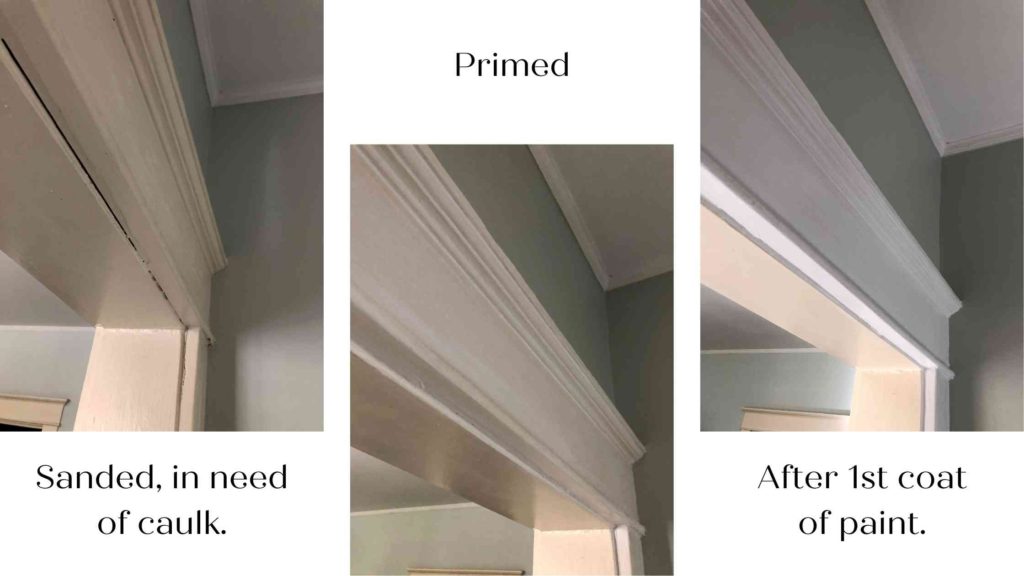
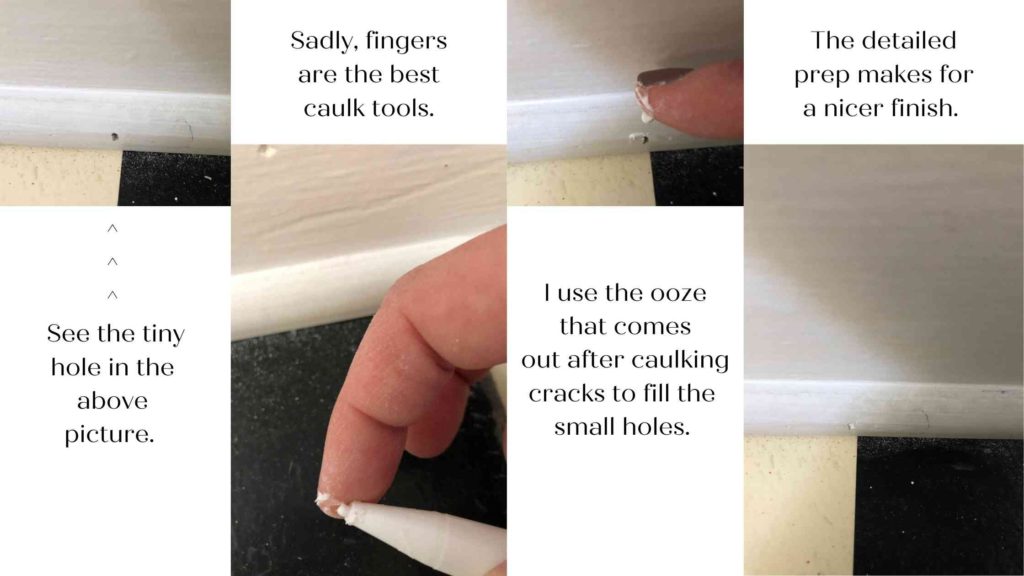
At least in the back of the house, none of the brad (tiny wire nails shot from a nail gun) holes on the painted quarter round (that trim between the baseboard and the floor) were ever caulked. It’s funny how you can live in a place for nearly thirteen years and not really pay attention to it! But when I’m doing a paint job, those unfinished details are glaringly obvious to me.
So I caulked the holes in the quarter round as well as cracks and gaps in the doorway trim.
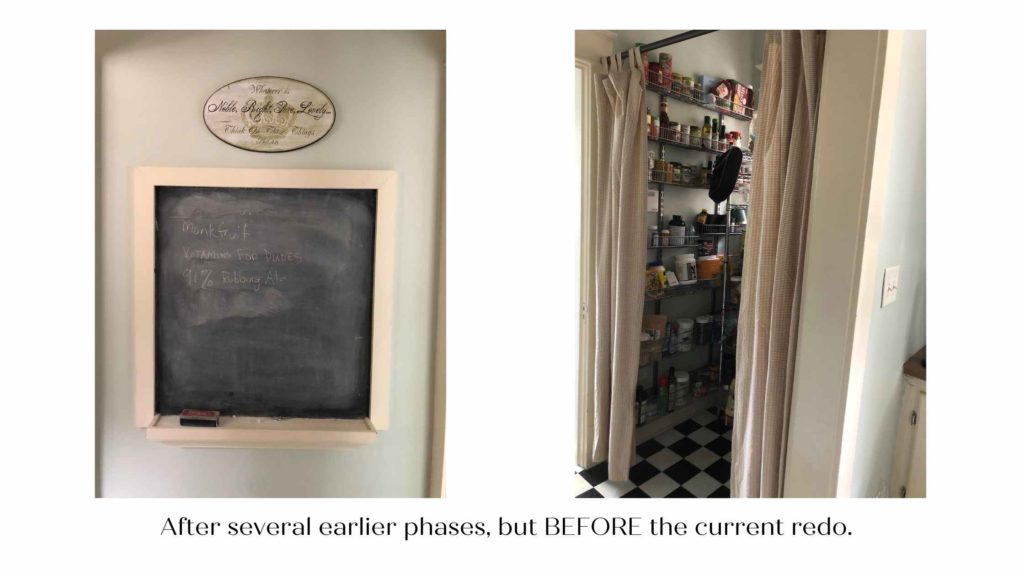
The Chalk Board Debacle Adventure
So in the middle of all the paint prep, I surprised myself by getting rid of our beloved back-door chalkboard. I was studying on giving it a fresh coat of paint when I got to thinking: it’s really too low for me to write on. Everything came out as a scrawl because for me (and the rest of my now grown family) the whole thing needed to be raised up by about a foot.
To keep??
It’s been a great attraction for all my nephews and the girls’ friends for many years. There would almost always be lingering fun notes and artwork after we’d have company in the house. That was when it was just the right height for all the little visitors we had.
And more recently we’ve used it on occasion for some experimental chalked memory verses done in fancy fonts.
Or not to keep?
MOST of the time, however, we just use it to scribble barely legible grocery list items. And that’s nice, because it IS just right there at the pantry. But we also have a Boogie Board on the fridge. And we ALL have our phones, which go to the store with us.
But ALL of the time, there’s chalkdust to clean up. To clean up from a NOT SMOOTHLY FINISHED baseboard. So many times over the years I’ve swept up piles of chalkdust. And it stays looking messy more than it stays looking nice.
So I decided rather hastily (before I got super sentimental and changed my mind) to get rid of it. I did check with the family first. The girls didn’t seem to care at all. My husband feigned heartbreak. But in the end, I think it was time for it to go.
It reduced the visual noise and the potential mess, and lightened up the space, hitting on the goals I have for all of this year’s redos.
Learn From My Mistakes:
It did create a little bit of an unexpected extra hassle, however.
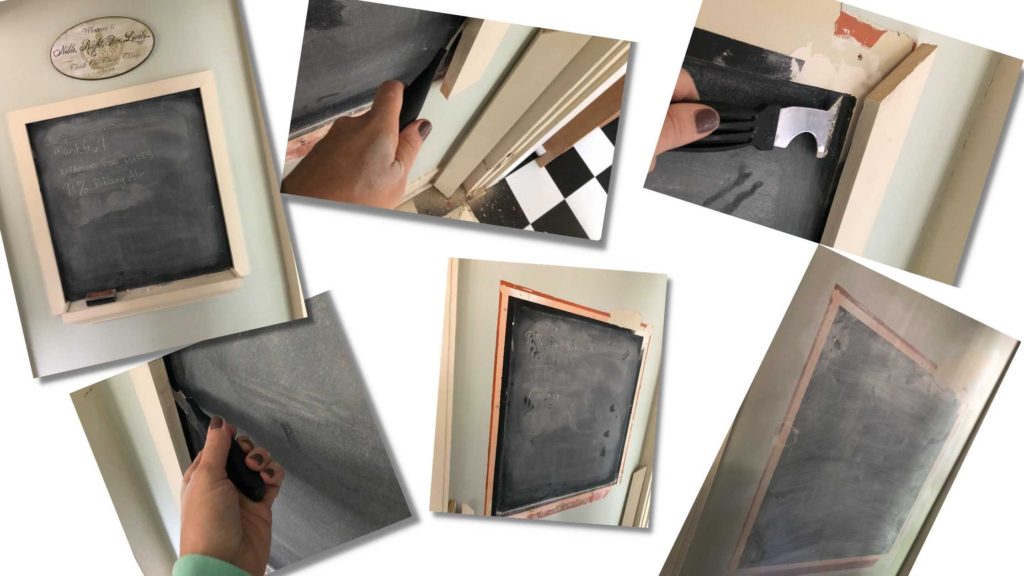
I carelessly began pulling down the wood trim around the chalkboard area because I had noticed a gap pretty much all the way around. But the top, which was ever so slightly above my eye level should have been sliced through with a blade. The trim held onto the wall paint and tore a large piece of two color layers of paint off the wall.
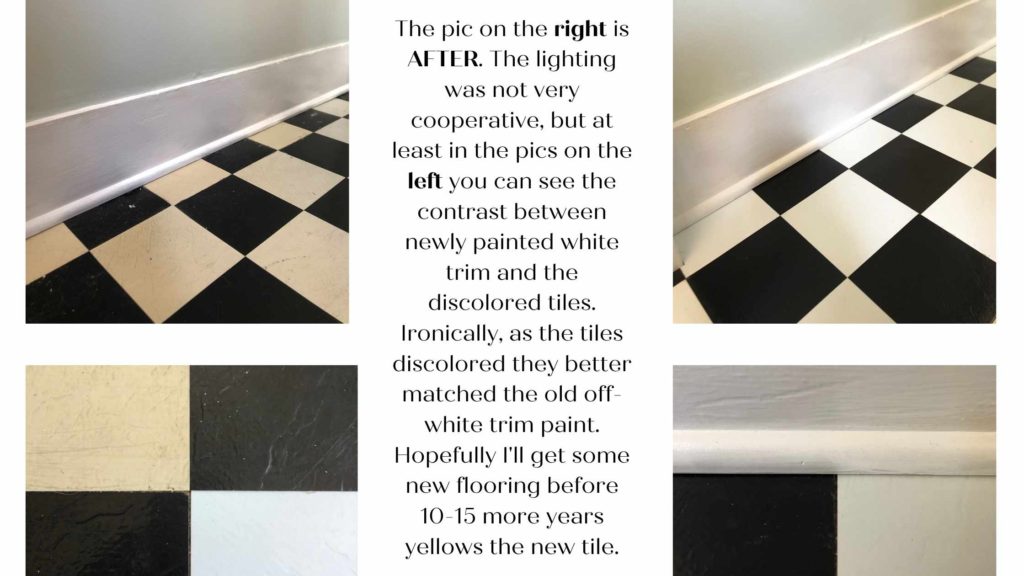
The surface underneath was very slick (not sure why…), so in trying to get rid of the loose paint, I ended up pulling off even more. You can see it in the bottom right two pictures above.
I ended up having to do some unexpected patching to level out the wall in order for the finished wall to be smooth. I patched and primed a couple of times.
Fun stuff.
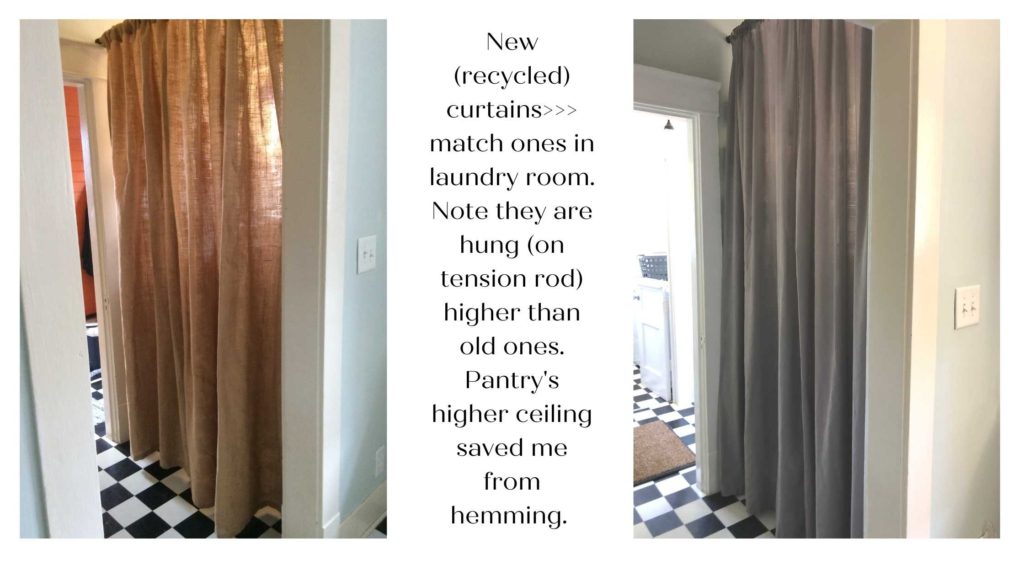
The Curtains
So my plan was to somehow modify the tab-tops I had already hanging, by perhaps adding a piece onto the top or bottom and losing the tabs. In the end, however, I just ended up using the other panels from older daughter’s room that matched the ones in the laundry room. It’s not the type fabric I had in mind, and perhaps I’ll change it later, but I felt it brought continuity to the back area, which is so chopped up. Not to mention that it was EASIER. I’m trying to learn to default more to the EASIER path. I have a strange propensity for making things hard.
The Floor
So, since the flooring is the same throughout the kitchen, pantry, foyer, and laundry room area, I am still using the floor tiles I bought at our Habitat for Humanity thrift store. I did discover that they weren’t exactly perfect, in that some of the white squares and black squares were slightly different size.
However, I was relieved that the adhesive seems to be as good as the MUCH more expensive version. And my family has yet to notice any discrepancies. The cheapskate in me thinks I can live with it, especially since I consider it a temporary solution anyway. Can you see where the two black square corners don’t meet perfectly in the picture below (top right)? Perhaps. But probably not if you were walking on it. 😆
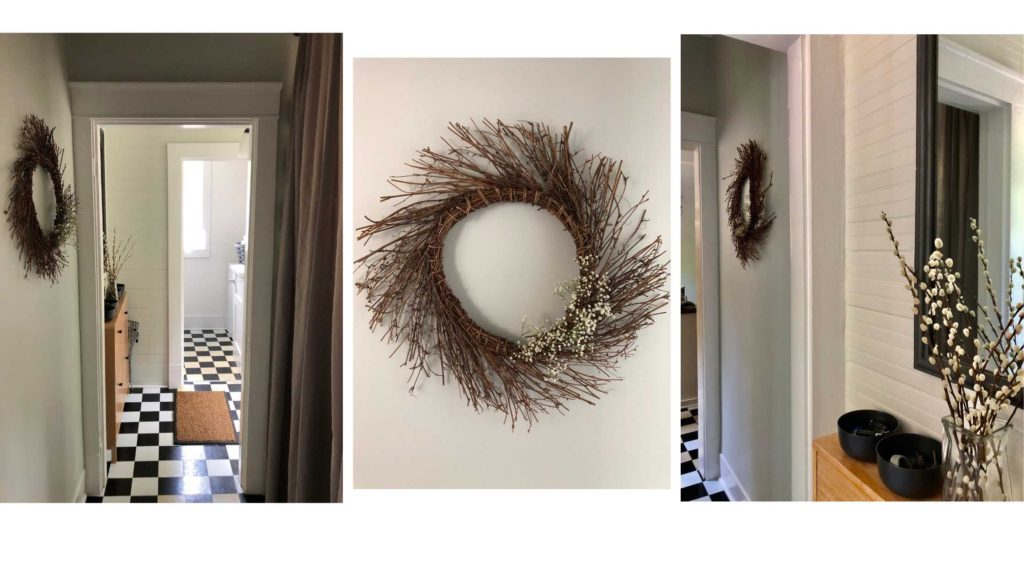
That Blank Wall…
I debated leaving the wall blank. Especially after I was relieved to have the mess I made of it back to a pristine, smooth state.
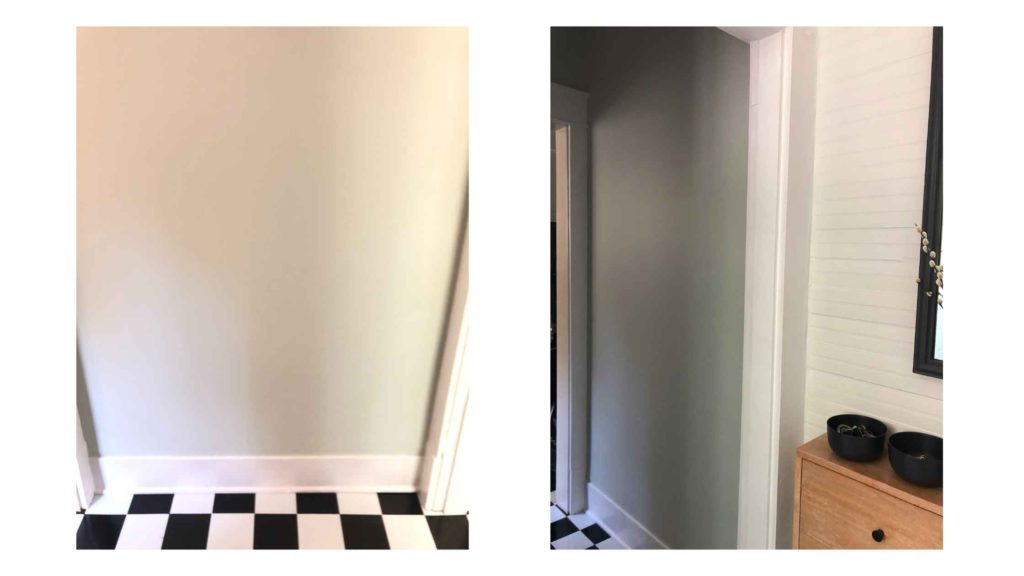
But the consensus around here was that it needed something. I just didn’t want to repeat the big rectangle motif going in the adjacent foyer. I figured I needed something more rounded or a grouping of smaller items.
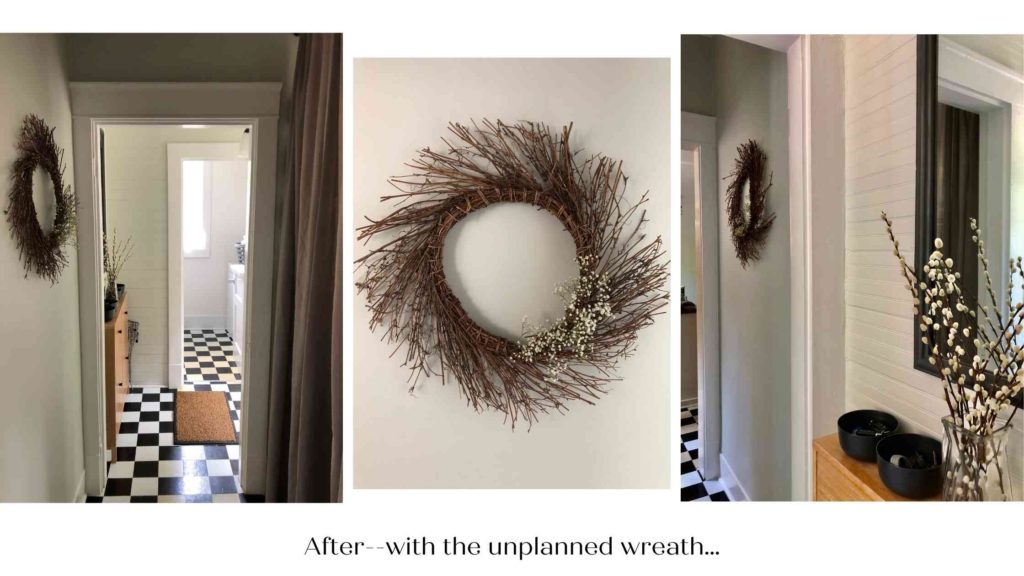
In the end, I decided I would love to have maybe a preserved eucalyptus wreath or something on that order. Instead, I was unable to find an available pocket of time to shop for said wreath at a reasonable (in budget) price. So I opted to go foraging in my basement stash.
I ended up dismantling an old fall wreath (jump down a couple of pictures to see) that had seen its better days. And I added in a few sprigs of baby’s breath I had in a vase on hand (to conceal its lopsidedness).
I considered this also a temporary fix, but it passed muster with the family.
The Results
I think it’s been harder to get excited about the pantry redo (for me) because no changes in the current wall color really reduces the “wow factor” for the whole project.
{Remember the inverse (or converse? I can never remember) is true: changing paint color is the most direct path to a “WOW” inducing redo.}
So, in truth, having the accountability of the blog is probably what’s kept me on task, even though I still have to repaint the window in behind the shelves. Feel free to check in and guilt me over it.
I think the small changes are still having a pretty big visual impact. Especially once I finish and put all my tools away… 😂
The Budget
Since I didn’t have to make any purchases, the only cost was in the floor tiles. And not even all the tiles had to be replaced since parts of the pantry have never seen the sun or foot traffic.
Total – $8.78 Box of 20 tiles.
And for the window I will likely use the expensive lead neutralizing stripper that caused me to go over budget on the laundry room.
Finally, I may invest in some bungee-type cords to tie back the curtains when the pantry is in heavy use.
Keeping the Laundry Room “Happy”
I’m going to reserve the right to change the curtains and/or the wreath if I come across the right thing at the right price, but I’m happy with the improvement for now.
As to the inside of the pantry, I think I will always need to tweak it to keep it in working order (much like the refrigerator). It’s SO important to do a regular check on expired goods, but also to work to EAT WHAT’S IN THERE, rather than constantly piling on new items on top of the old. Use the FIFO (first in, first out) rule like the grocery store stockers would.
I would like to use more clear containers for cereals, grains, chips, and the like, but I know in the past it’s been a struggle for me to maintain that practice all the time. It’s so much easier to keep everything in its original packaging. But I find it helps everyone to find what they’re looking for, especially when we get a little overstocked on snacks and staples. So perhaps I’ll just reserve it for when we get a little piled up, like we often do after the holidays or really busy times.
I’d love to hear about your pantry woes, challenges, and/or brilliant solutions. Along with any ideas you have for improving mine!
Blessings,
